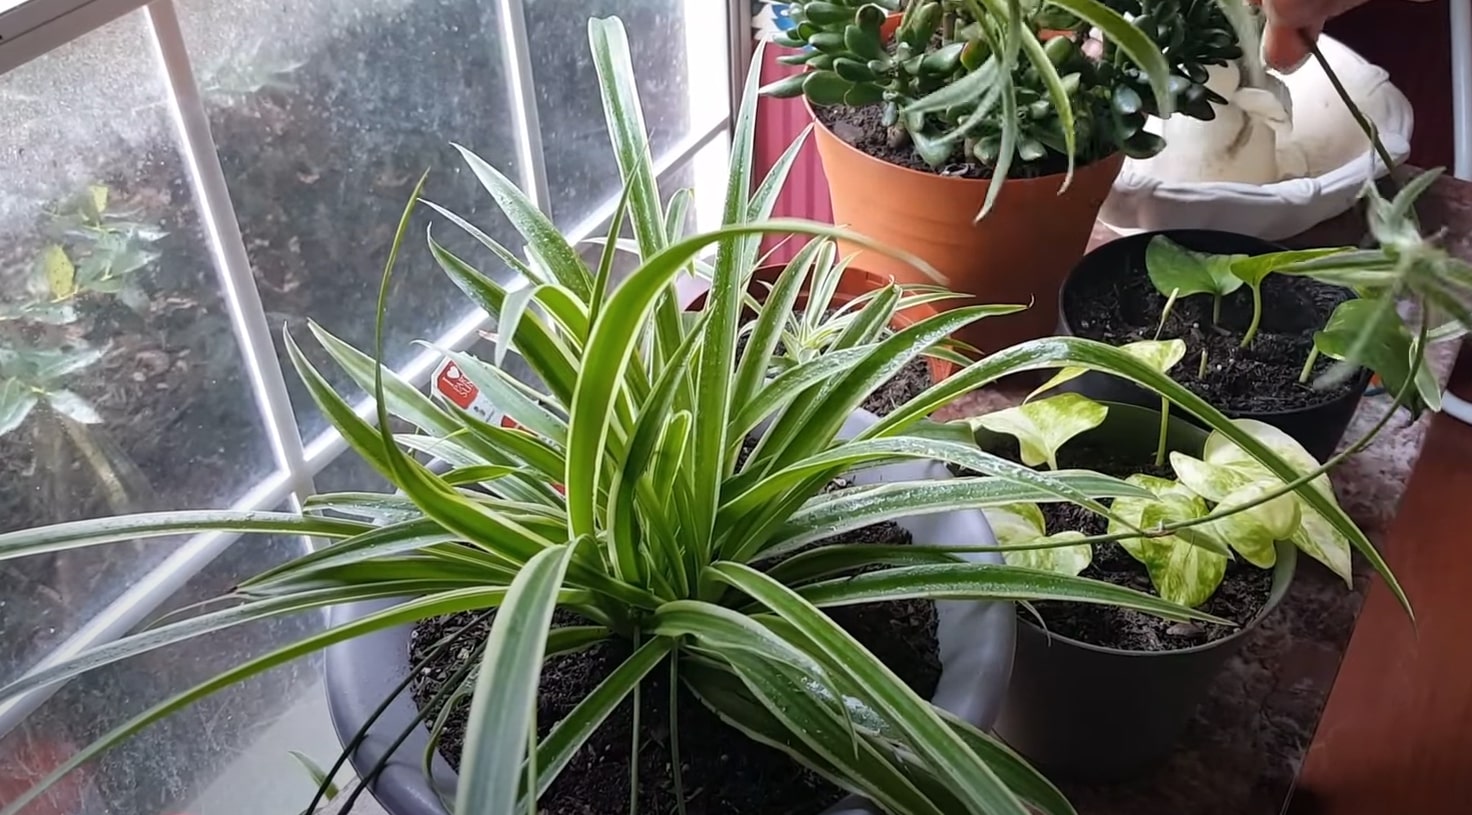
Are you an avid houseplant enthusiast with a passion for spider plants?
Perhaps you’ve noticed that your beloved Chlorophytum comosum could use a little more volume and vibrancy in its foliage.
If you’re yearning to take your spider plant’s appearance to the next level, you’re in the right place!
These beautiful, air-purifying wonders have undoubtedly captured the hearts of many with their arching, variegated leaves.
But what if we told you there’s a way to take your spider plant to a whole new level of lushness and vibrancy? Yes, you heard it right – in this blog post, we’re spilling the secrets on how to make your spider plant bushier than ever before.
Bushy Spider Plants: A Quick Glance
| Factors | How to Make Spider Plants Bushier |
|---|---|
| Lighting | Place in bright, indirect light. Avoid direct sunlight. |
| Temperature | Maintain temperatures between 65°F to 75°F (18°C to 24°C). |
| Humidity | Provide moderate to high humidity levels. |
| Soil | Use well-draining soil to prevent waterlogged roots. |
| Watering | Keep soil consistently moist, avoid overwatering or underwatering. |
| Pruning | Regularly trim faded or damaged leaves to stimulate growth. |
| Fertilization | Use balanced, water-soluble fertilizer during active growth. |
| Repotting | Repot when root-bound to allow room for new growth. |
| Light Duration | Provide up to 12 hours of light per day for optimal growth. |
| Offsets | Propagate through offsets or plantlets to create new plants. |
Factors Affecting Bushiness
- Light Requirements: Adequate light is crucial for the overall health and bushiness of spider plants. They thrive in bright, indirect light. Insufficient light can lead to weak, elongated stems and sparse growth, while too much direct sunlight may scorch their leaves.
- Temperature and Humidity: Spider plants prefer moderate temperatures and moderate to high humidity levels. Extreme fluctuations in temperature or excessively dry air can impede their growth and bushiness.
- Soil and Potting: Well-draining soil is essential for spider plants. The right soil mix provides proper aeration and prevents waterlogged roots, ensuring the plant receives the necessary nutrients for bushier growth. Choosing an appropriately sized pot is also crucial to prevent root crowding.
- Watering Practices: Overwatering or underwatering can negatively impact a spider plant’s bushiness. Keeping the soil evenly moist but not soggy is essential. Inconsistent watering may cause stress, leading to leggy growth or stunted development.
- Pruning and Maintenance: Pruning is a powerful technique to encourage bushier growth. Regularly trimming away faded or damaged leaves and removing offsets can stimulate the production of new shoots and create a fuller, more vibrant appearance.
- Fertilization: Proper fertilization provides essential nutrients that support healthy growth. Using a balanced fertilizer with the right NPK ratio (Nitrogen, Phosphorus, and Potassium) can contribute to robust foliage and encourage bushiness.
- Root Health and Repotting: A healthy root system is the foundation for a bushier spider plant. If the roots become pot-bound, the plant’s growth can be hindered. Repotting when necessary allows the roots to spread and absorb nutrients more effectively.
- Light Intensity and Duration: Besides ensuring proper lighting, the duration of light exposure matters too. Spider plants require around 12 to 16 hours of light each day for optimal growth. Maintaining a consistent light schedule is beneficial for bushiness.
By carefully considering and addressing these factors, you can create an ideal environment for your spider plant, promoting its natural bushy growth and enhancing its beauty as a cherished houseplant.
How To Make Spider Plant Bushier
Trim and Prune Your Spider Plant
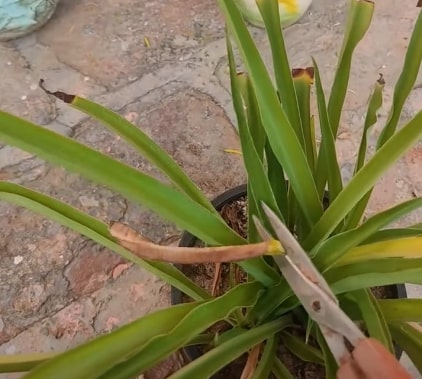
Trimming and pruning your spider plant is a simple yet powerful way to promote bushier growth and maintain its overall health.
To begin, gather the right tools, ensuring you have a clean pair of sharp scissors or pruning shears. Dull tools can cause damage to the plant, so it’s essential to use well-maintained and sharp cutting instruments for the task at hand.
Before making any cuts, take a careful look at your spider plant to assess its condition. Identify any discolored, damaged, or dried-out leaves – these are the ones you’ll want to trim to encourage new growth. Start by removing any dead or yellow leaves from the base of the plant.
Cut the leaf stem as close to the main stem as possible without damaging it. This not only improves the plant’s aesthetics but also prevents the potential spread of diseases.
If your spider plant has produced flowers that have started to fade, carefully trim them off at their base. This will redirect the plant’s energy towards foliage growth instead of seed production, contributing to a bushier appearance.
Spider plants often produce baby plants called offsets or pups. Once these offsets have grown to a reasonable size (around 2-3 inches in length), you can gently detach them from the mother plant. Use your fingers to wiggle them free or make a clean cut with your scissors.
These offsets can be repotted to grow new individual spider plants or given away to friends and family as delightful gifts.
To stimulate bushier growth, consider trimming some of the longer stems back to the main plant. Make the cuts just above a node, which is the point where leaves emerge from the stem. This encourages new shoots to develop from that node, leading to a fuller and more lush appearance.
While pruning, keep in mind to maintain a balanced and symmetrical shape for your spider plant. This ensures that sunlight reaches all parts of the plant, promoting even growth and preventing any areas from becoming too dense or deprived of light.
Repot your Spider Plant
Repotting your spider plant is a crucial step in maintaining its health and promoting bushier growth. As your spider plant grows, its root system can become crowded, restricting its access to essential nutrients.
Repotting provides the plant with fresh soil and space for its roots to spread, encouraging robust growth.
To repot your spider plant successfully, choose the right time, typically during spring or early summer when the plant is actively growing and can recover quickly from the transplant.
Select a new pot that is 1 to 2 inches larger in diameter than the current one, and ensure it has drainage holes to prevent waterlogging.
Gently remove the spider plant from its current pot by turning it upside down and tapping the bottom to loosen the root ball.
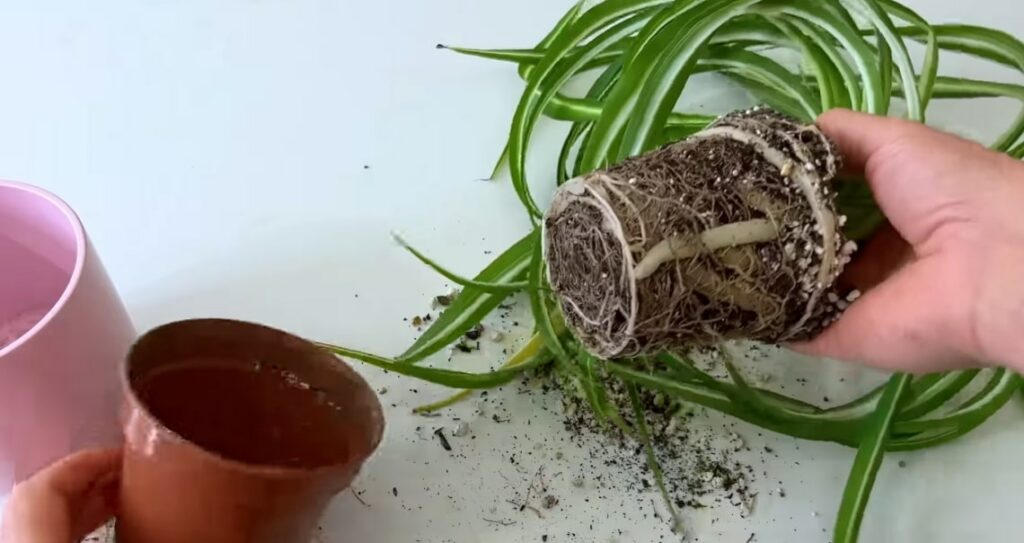
Carefully slide the plant out, holding it by the base of the stems. Inspect the roots for any signs of rot, damage, or entanglement. If you notice any issues, trim away any affected roots with clean scissors.
Add a layer of the new potting mix at the bottom of the new pot and make a small mound in the center to support the plant’s base. Position the spider plant on the mound, ensuring its base is centered in the pot. Fill the sides with the potting mix, gently pressing it down to secure the plant in place.
After repotting, water the plant thoroughly to help the soil settle and eliminate air pockets around the roots. For the first few days, place your spider plant in indirect light to minimize stress and encourage root establishment.
Ensure The Spider Plant Gets Enough Light
Ensuring your spider plant gets enough light is essential for its overall health and bushy growth. As a light-loving plant, spider plants thrive when placed in the right amount of light.
To provide the best lighting conditions for your spider plant, follow these simple tips.
First and foremost, position your spider plant in an area that receives bright, indirect light. Placing it near a window with filtered sunlight is ideal.
This allows the plant to benefit from the sun’s rays without being subjected to direct sunlight, especially during the hot afternoon hours when the sun’s intensity can scorch the delicate leaves.
Consider the orientation of your windows when deciding on the perfect spot for your spider plant. South or east-facing windows are usually excellent choices as they provide a good balance of light throughout the day.
These windows allow your spider plant to receive sufficient sunlight without being overwhelmed by the intense heat of direct afternoon sun.
To promote even growth and prevent your spider plant from leaning towards the light, remember to rotate the plant occasionally.
This simple practice ensures that all sides of the plant receive equal exposure to light, leading to a well-balanced and attractive appearance.
Take A Note Of Temperature Requirements
Taking note of temperature requirements is vital to ensuring the optimal growth and health of your spider plant. While spider plants are relatively adaptable and can tolerate a range of temperatures, providing them with the right conditions will promote their bushiness and overall well-being.

Here are some key points to consider regarding temperature:
Spider plants thrive in average room temperatures ranging from 65°F to 75°F (18°C to 24°C). They are well-suited to typical indoor environments and can thrive in most homes with central heating and cooling systems.
However, they can tolerate slightly cooler temperatures, down to around 50°F (10°C), without significant issues. On the other hand, exposing them to temperatures below this range for extended periods can be detrimental to their growth and may cause stress.
During the colder months, it’s essential to shield your spider plant from cold drafts and keep it away from cold windows. Maintaining a consistent temperature in the room will help prevent shock and stress on the plant during the winter season.
Similarly, in the summer, make sure your spider plant is not exposed to direct, scorching sunlight for extended periods.
If the temperature rises significantly, consider providing some shade or moving the plant to a cooler spot indoors. Spider plants can tolerate a bit of warmth, but temperatures above 90°F (32°C) for extended periods can cause stress and hinder their growth.
Fertilize Your Spider Plant
Fertilizing your spider plant is a key component in promoting its bushier growth and overall vitality. Providing the right nutrients helps sustain its lush foliage and encourages the production of new shoots and offsets.
To effectively fertilize your spider plant, follow these essential steps:
First, choose a balanced, water-soluble fertilizer specifically formulated for houseplants. Look for a fertilizer with an equal NPK ratio or a slightly higher nitrogen (N) content to support foliage growth. A typical NPK ratio for a balanced fertilizer is 10-10-10 or 20-20-20.
Before applying the fertilizer, make sure to dilute it with water at half the recommended strength. This step is crucial to avoid over-fertilization, which can harm the plant. The diluted solution ensures that the plant receives essential nutrients without being overwhelmed.
When applying the fertilizer, water your spider plant thoroughly beforehand to avoid stressing the roots. Pour the diluted fertilizer solution into the pot, ensuring even distribution throughout the soil. This way, the plant can absorb the nutrients effectively.
Be attentive to your spider plant’s response to fertilization. If you notice burnt leaf edges or browning, it may indicate over-fertilization. In such cases, reduce the frequency of fertilization or use a more diluted solution to avoid harming the plant.
Propagation
Propagation is a wonderful way to expand your spider plant family and create new bushy specimens. Spider plants are relatively easy to propagate, and there are two common methods to do so:
Spider plants naturally produce baby plants known as offsets or pups. These baby plants grow from long stems that emerge from the base of the mature plant. To propagate through offsets:
- Wait until the offset has grown to a reasonable size, usually around 2-3 inches long.
- Carefully remove the offset from the mother plant using clean scissors or your fingers, making sure to keep some of the root attached.
- Plant the offset in a small pot with well-draining soil, and water it lightly. Place it in a warm, bright location with indirect light.
- Keep the soil consistently moist until the new plant establishes its roots. Over time, the offset will grow into a mature spider plant, creating a lush and bushy addition to your plant collection.
Take a look at all varieties of spider plants, including the Hawaiian spider plant and Bonnie curly spider plant.
Bushy Spider Plant: Key Takeaways
In conclusion, making your spider plants bushier is a rewarding and achievable goal that enhances their overall beauty and vitality.
By taking into account essential factors such as appropriate lighting, temperature, humidity, soil, watering practices, pruning, and fertilization, you can create an ideal environment for your spider plant to flourish.
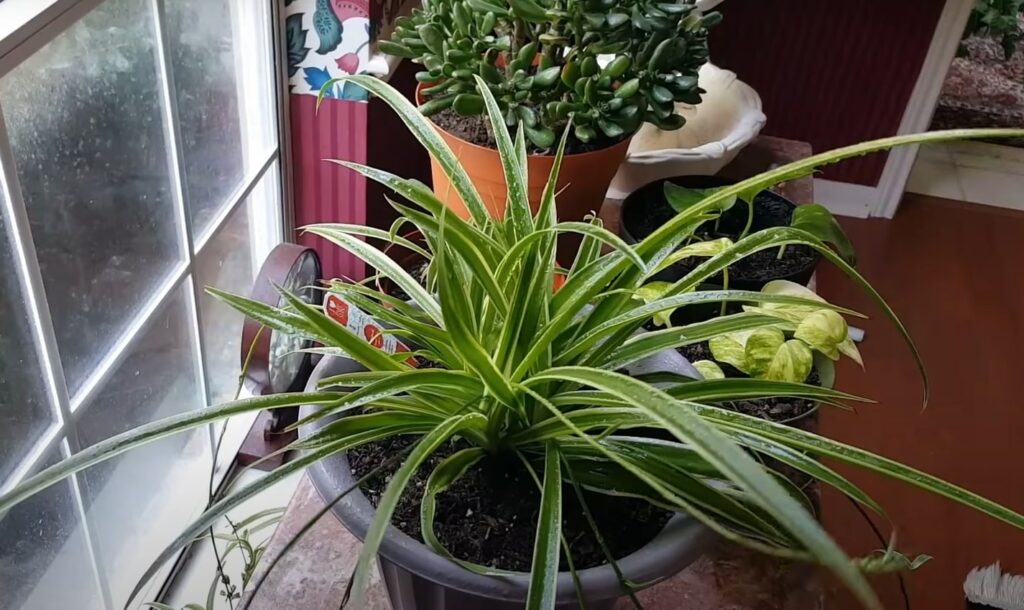
As you care for your spider plant with attention to these factors, you’ll witness its transformation into a thriving, bushier specimen, bringing joy and beauty to your indoor space.
With a little love and thoughtful care, your spider plant will become a centerpiece of green splendor, radiating its charm and enhancing the ambiance of your home.
Leave a Reply